Getting Started
This step by step guide will walk you through building your first chatbot with Callbell.
Prerequisites
You will need to create an account on Callbell and have configured at least 1 channel in order to be able to follow this guide.
- Sign up for Callbell
- See more information about our WhatsApp Business API integration for using the bot flow builder with WhatsApp.
Creating your first chatbot
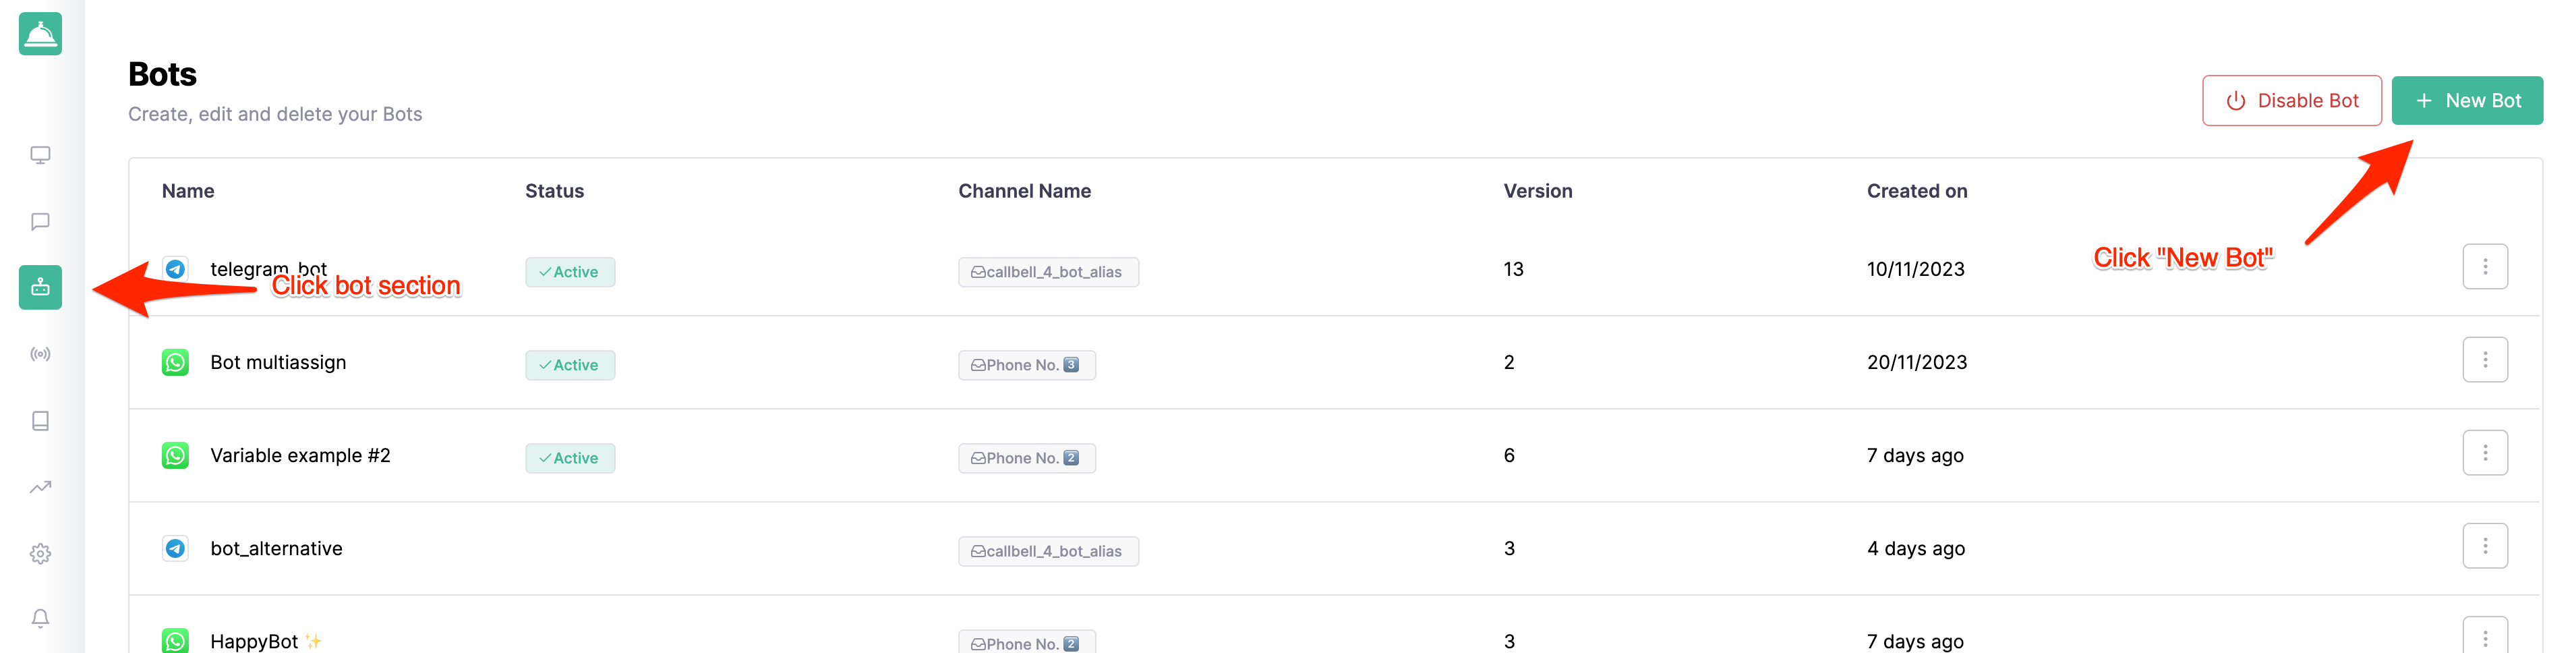
Navigate to the Bot Builder section in the left sidebar and click on the Create new bot button:
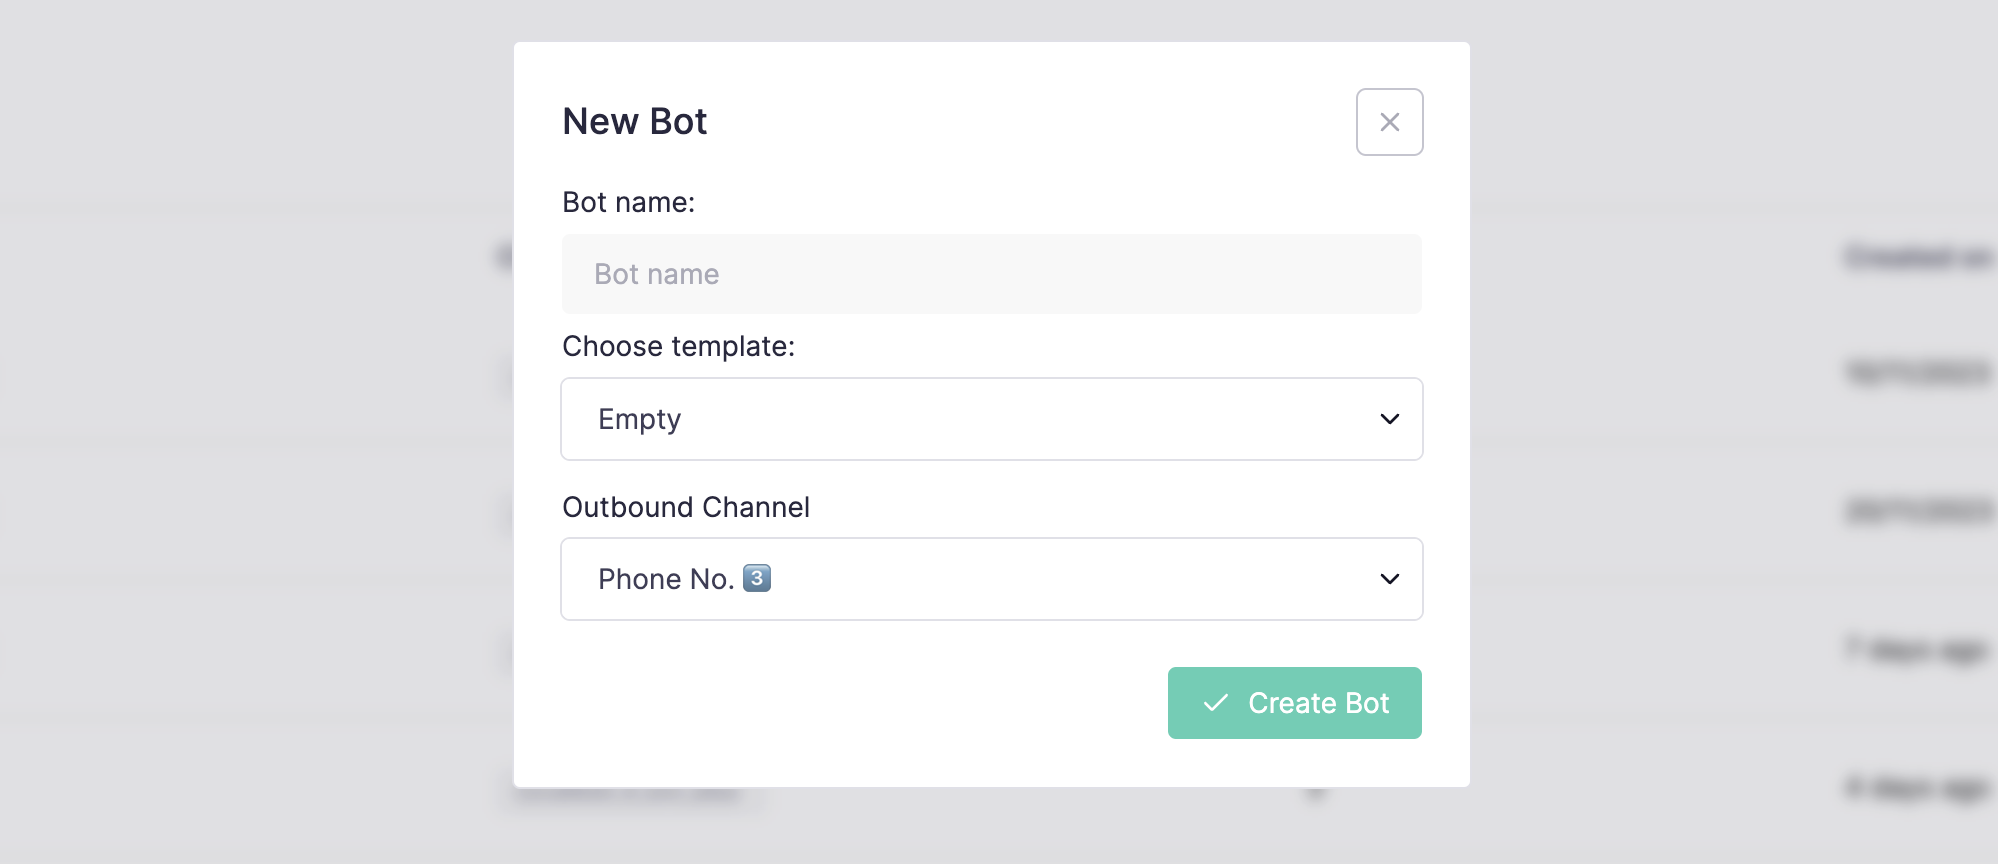
A modal will pop up asking you to choose a name for your bot and the channel you want to use it with:
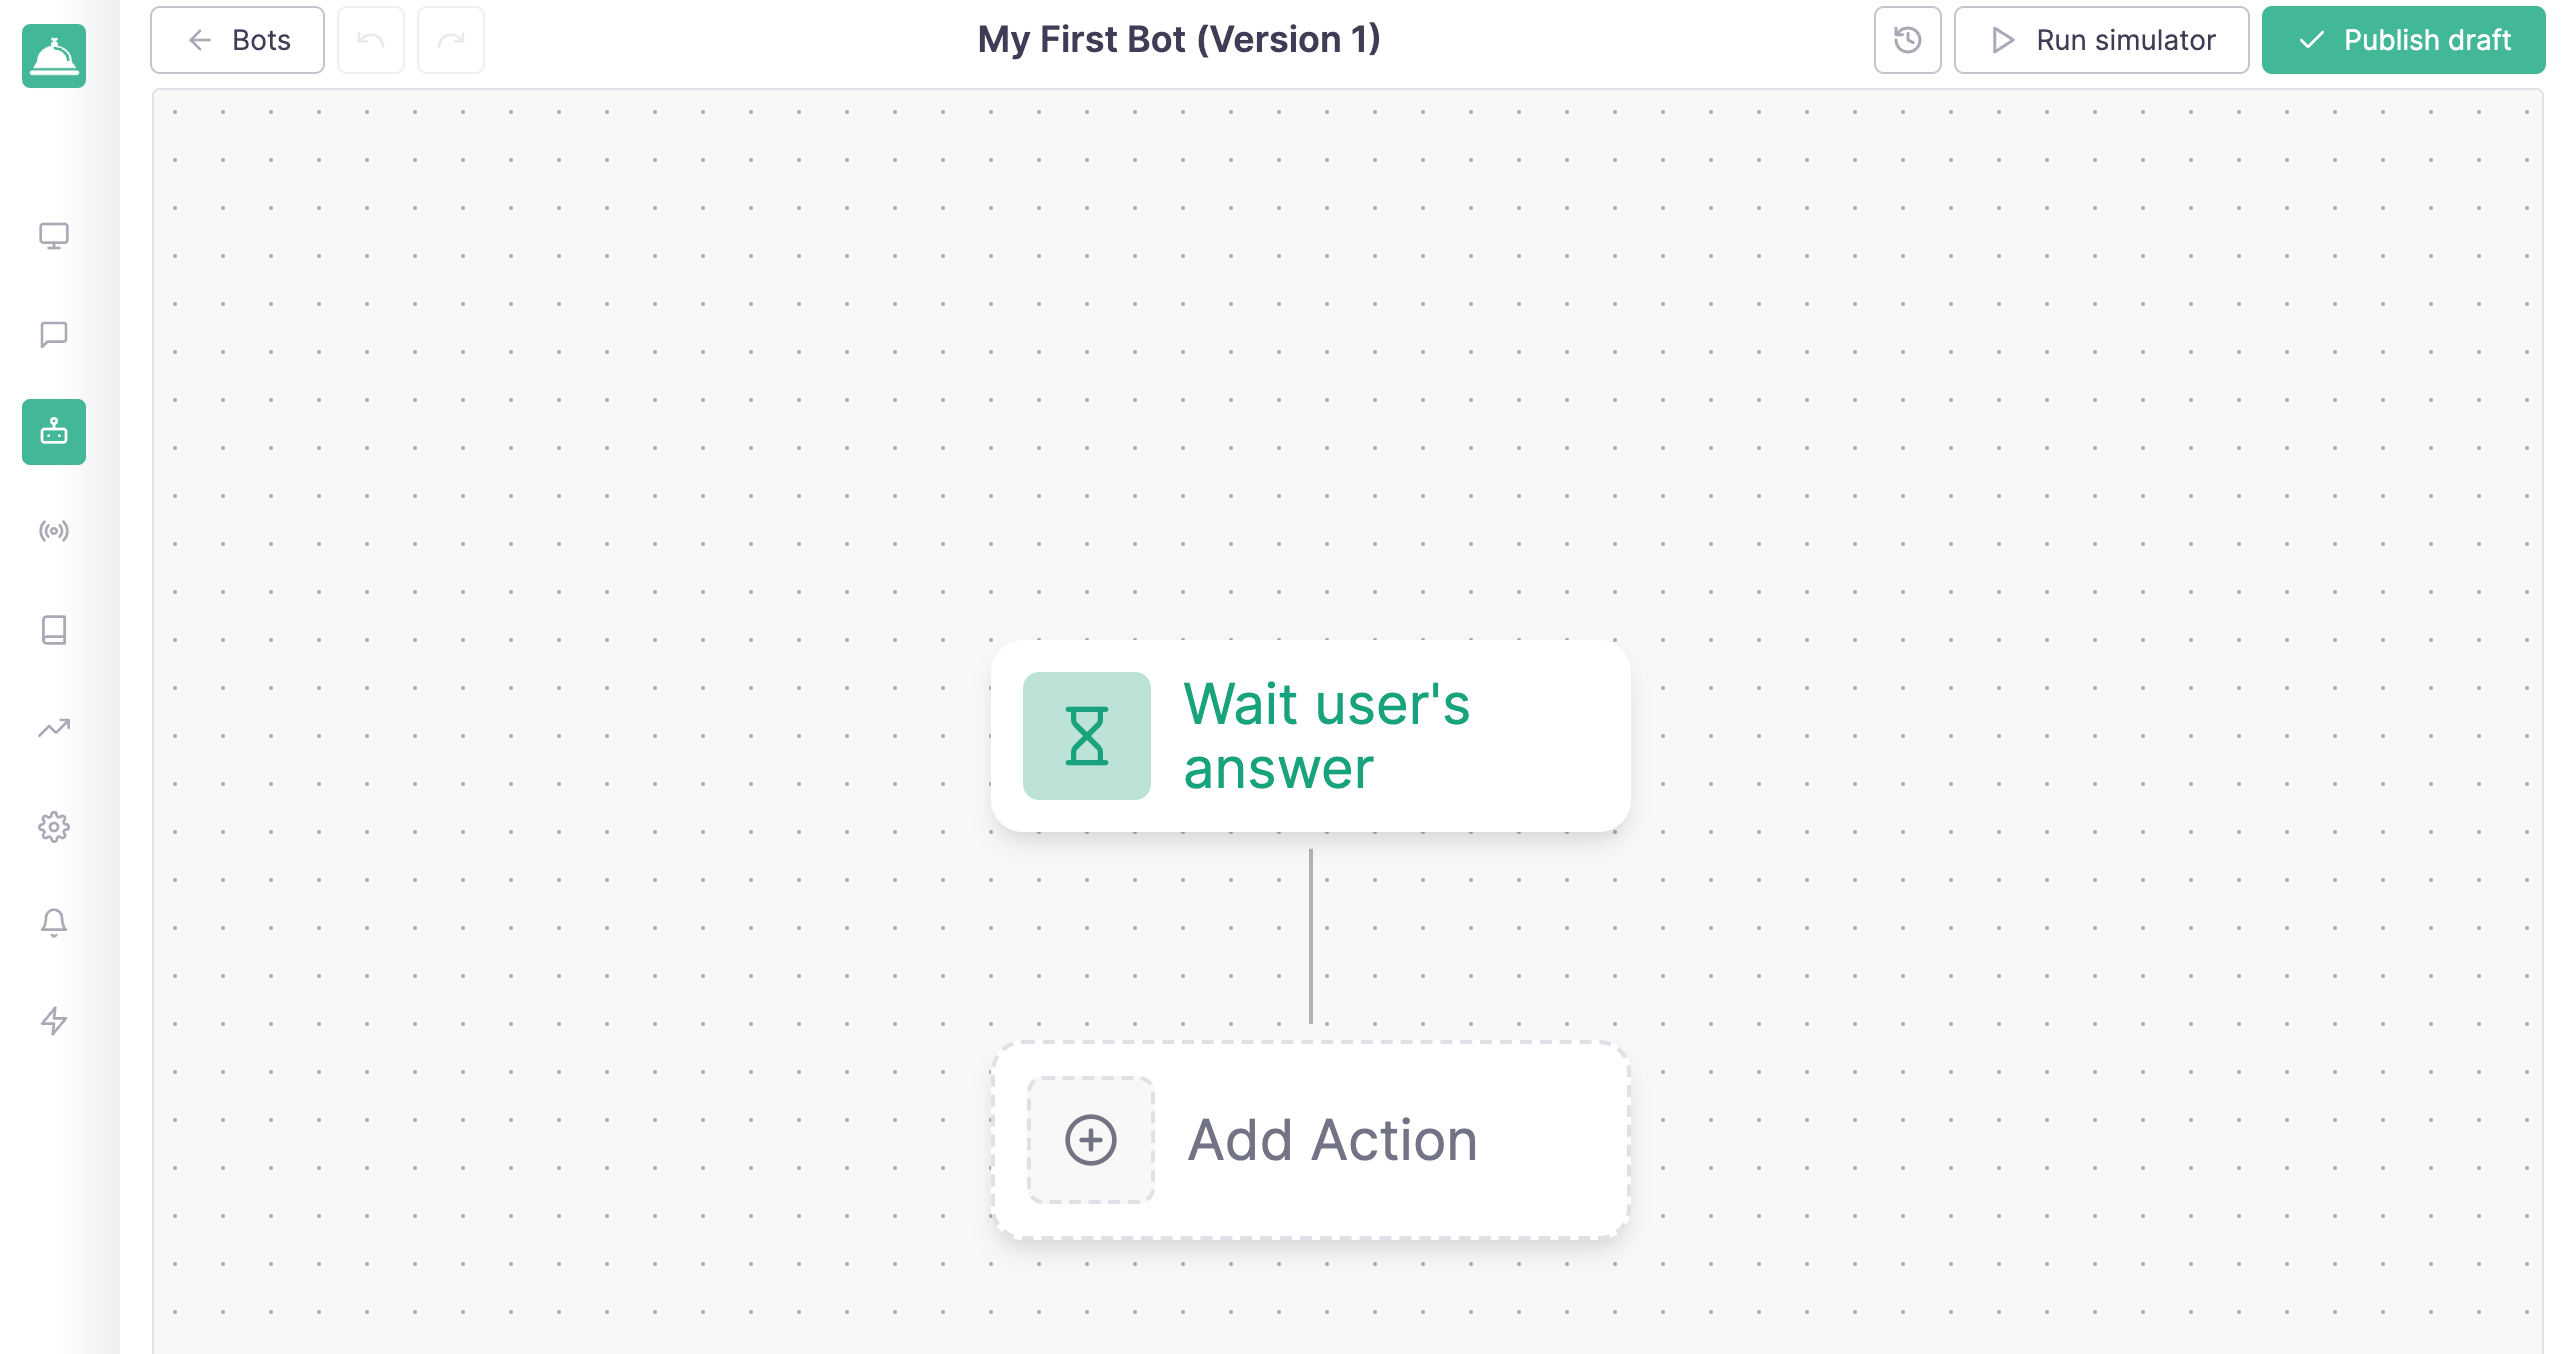
After clicking on the Create bot button you'll be redirected to the bot builder page where you can start building your first chatbot:
Adding a new action
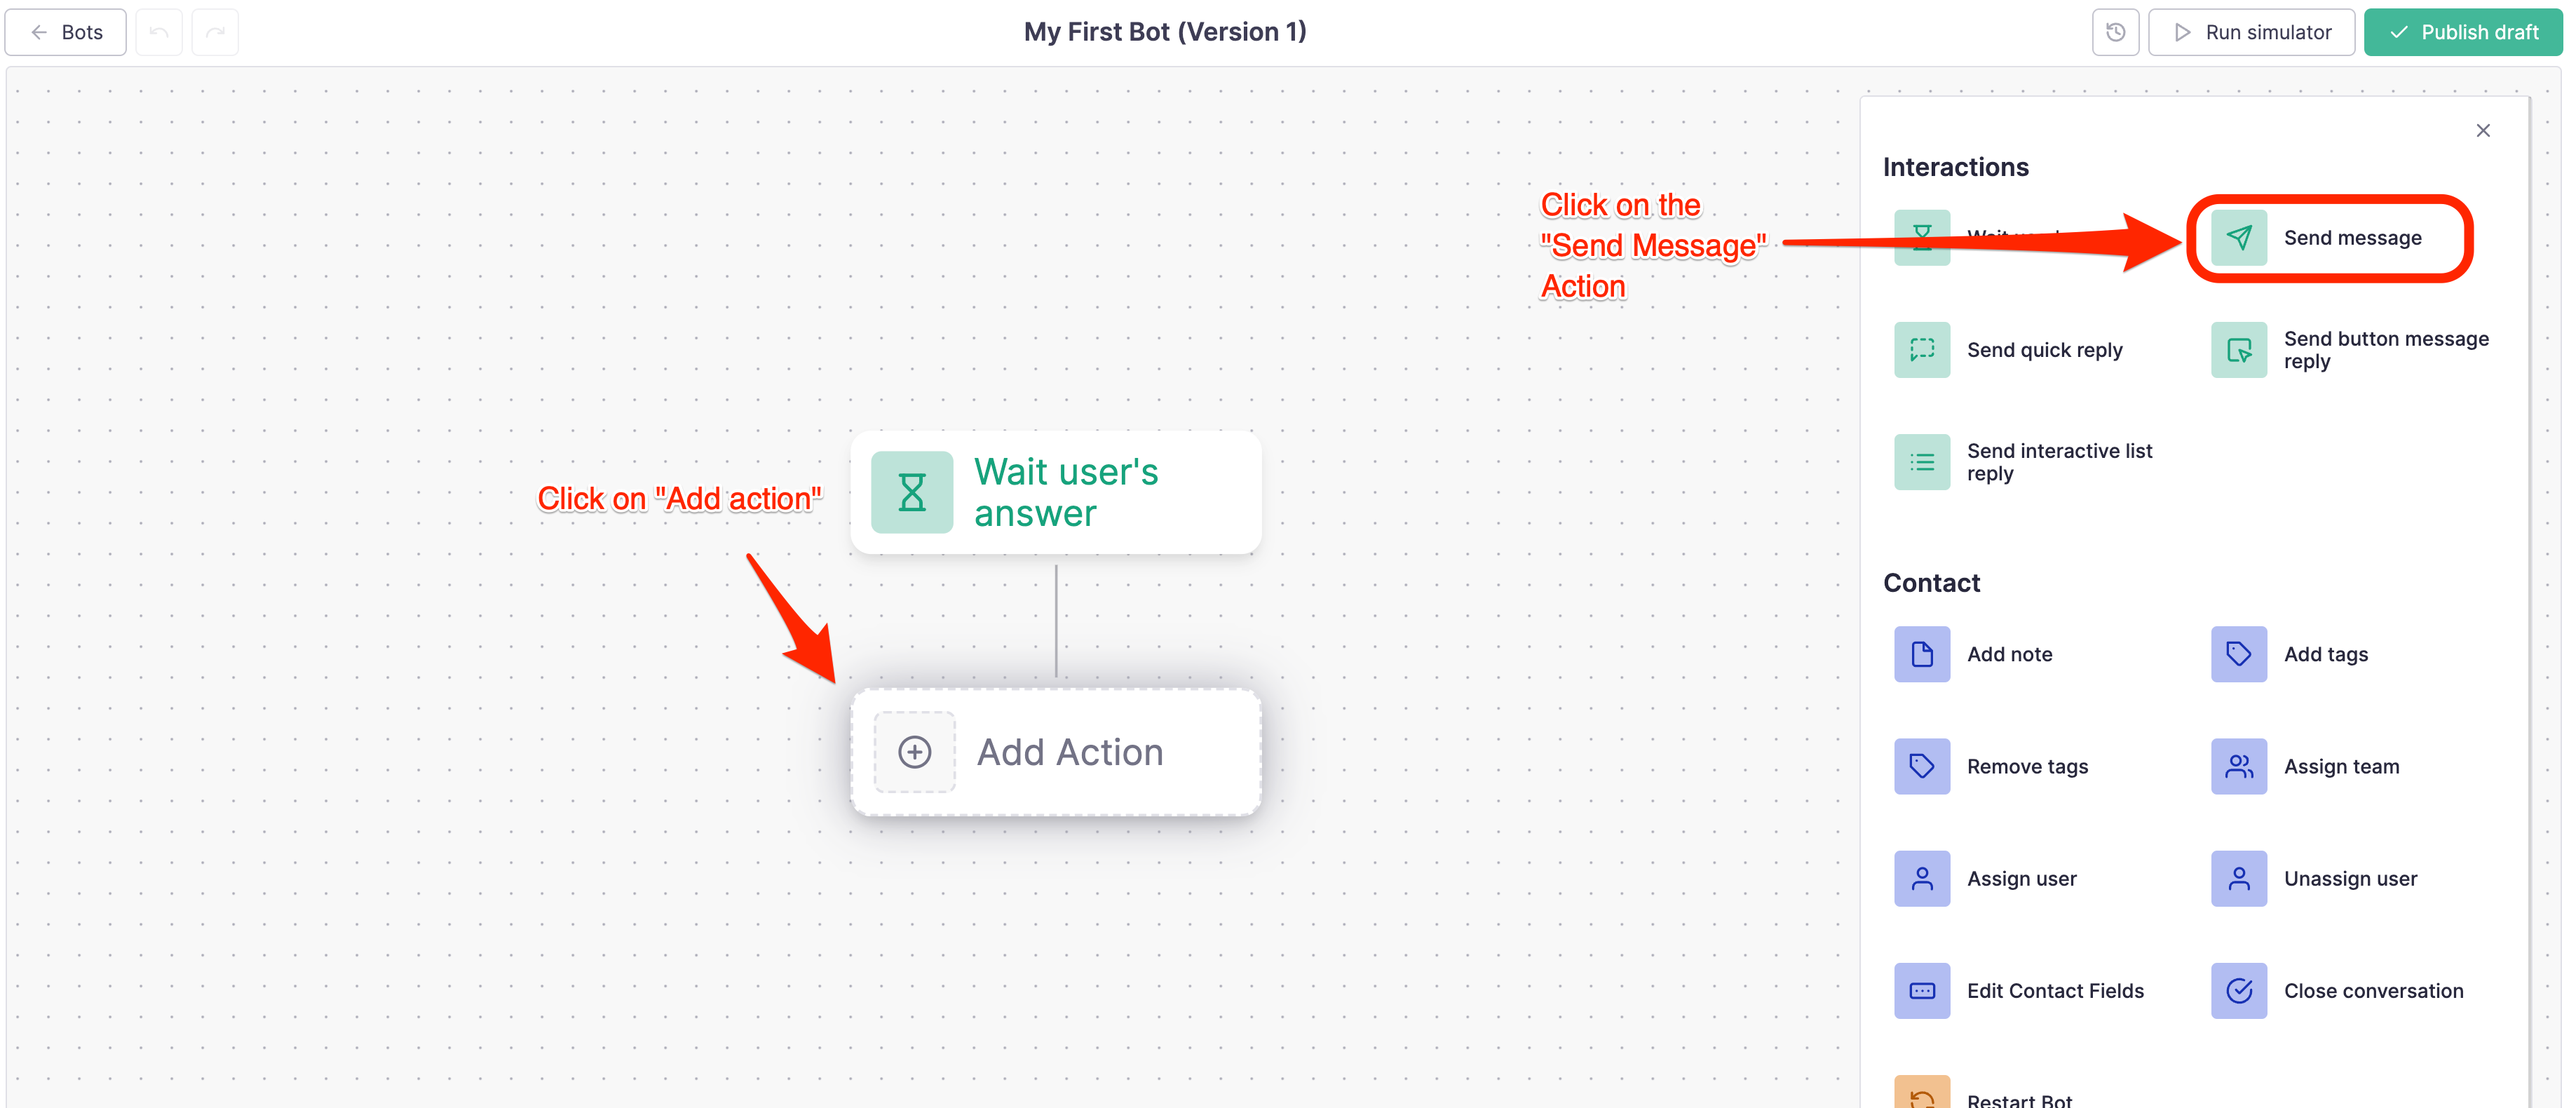
In order for the bot to work you'll have to add at least one action. For example, let's reply to the user with a message when he/she sends a message to the bot.
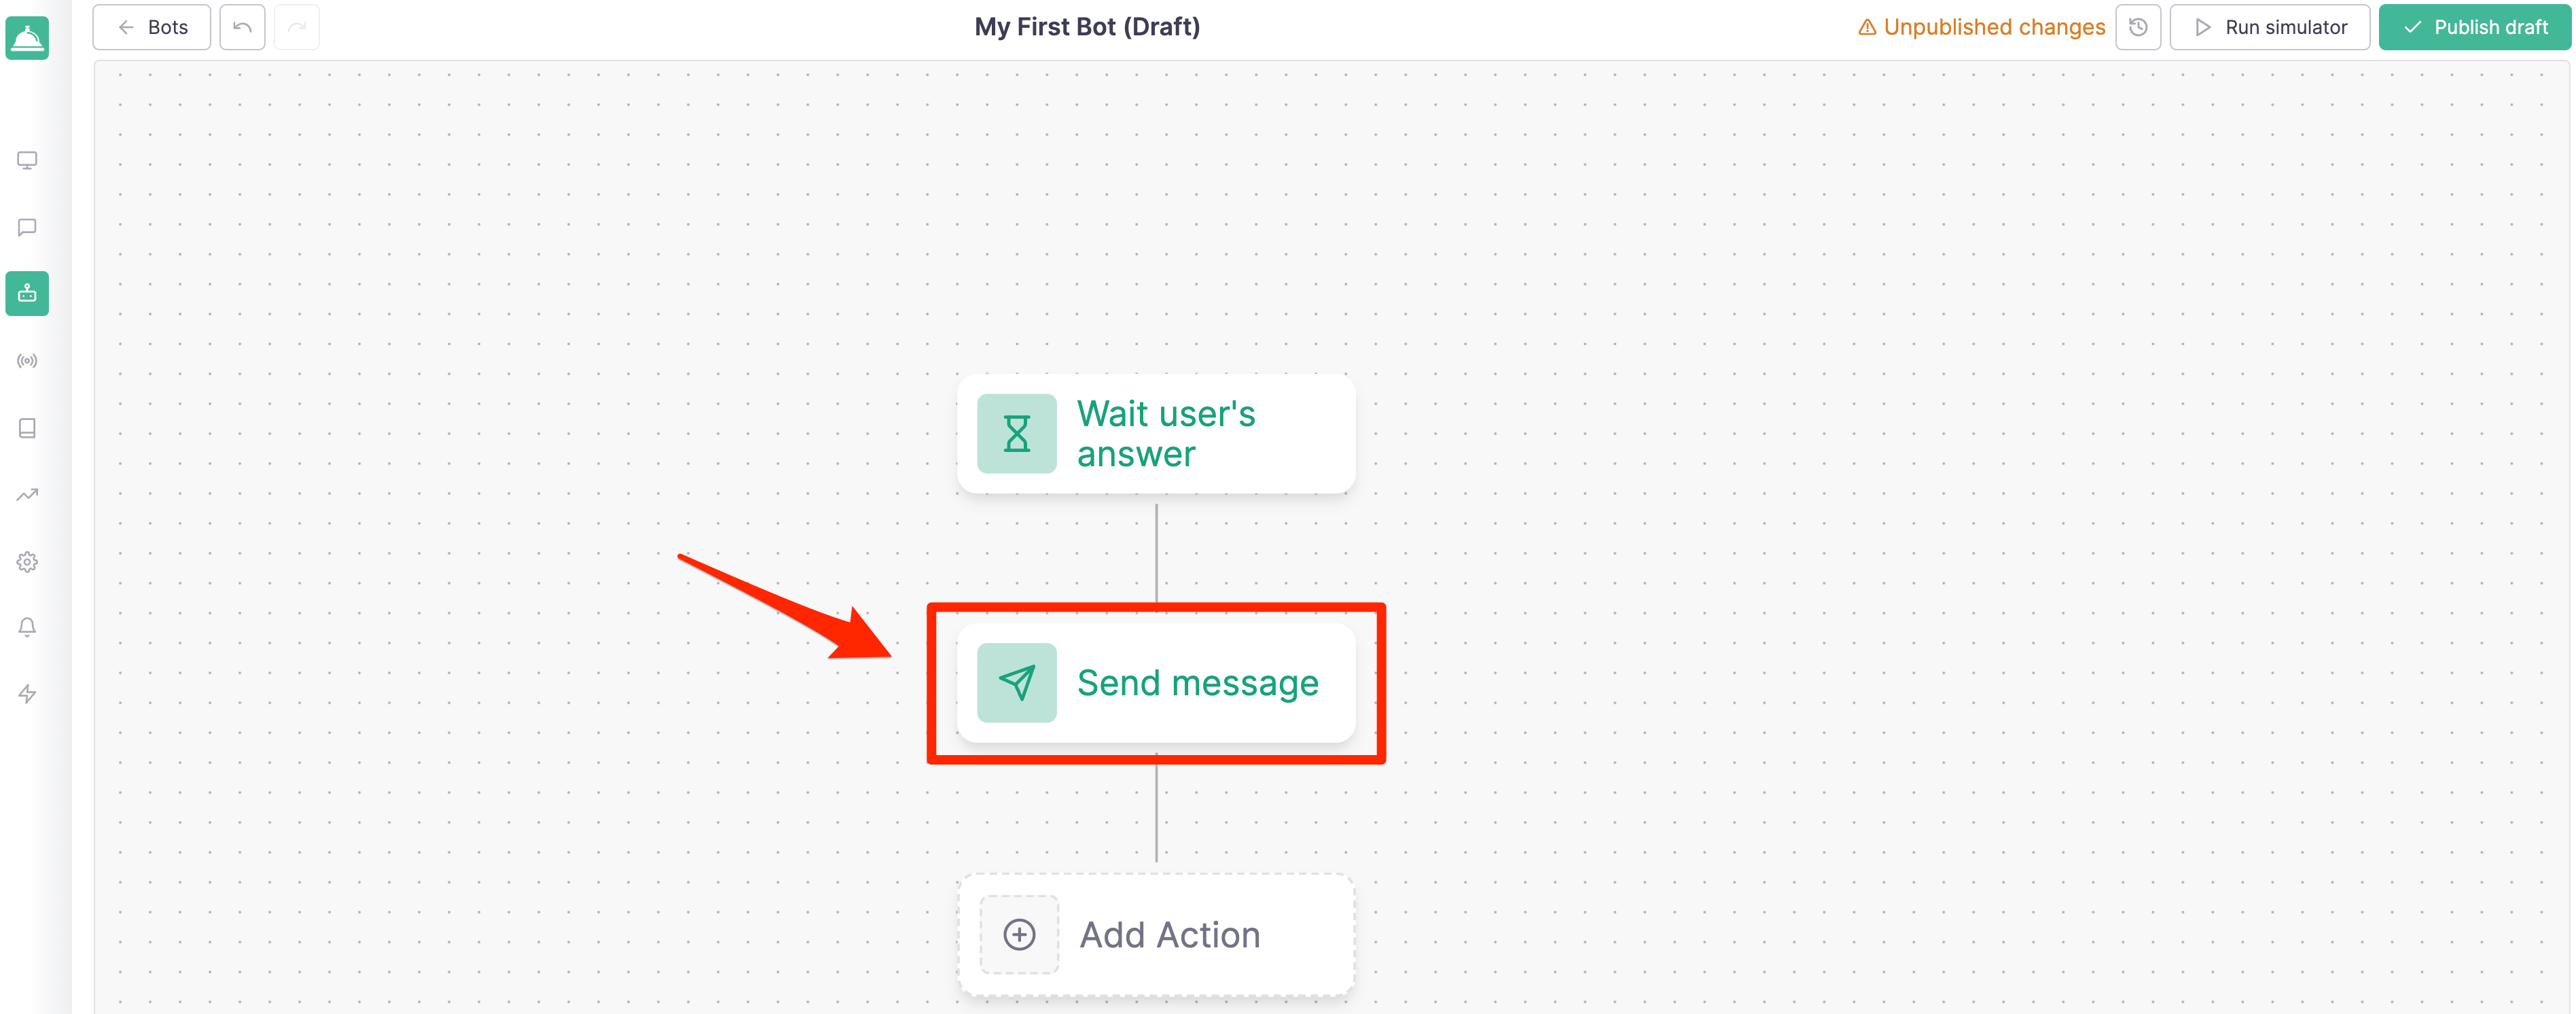
Click on the Add new action button and select the Send Message action:
A panel will open so you can use to configure the action. In this case we'll just add a simple text message:
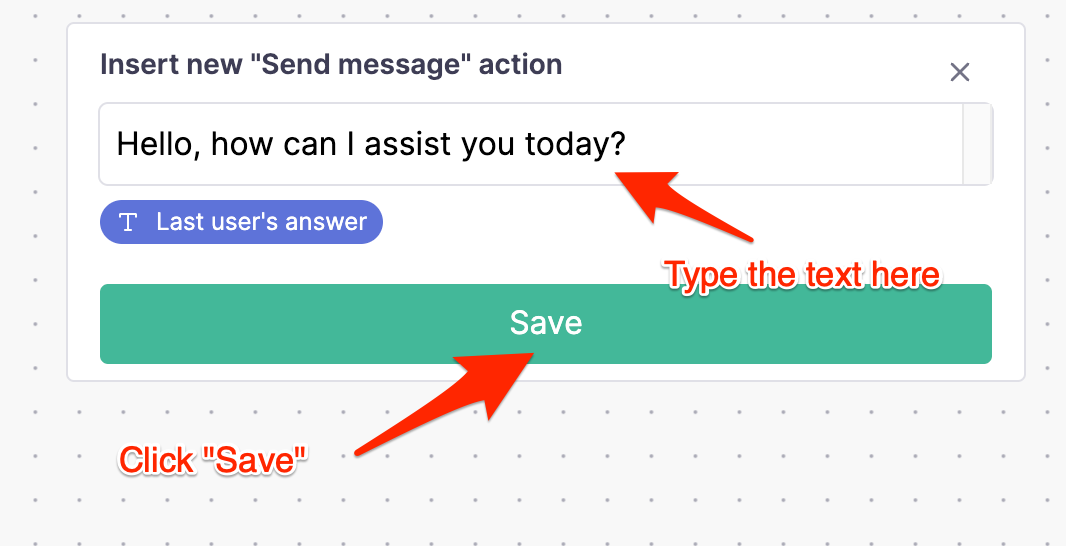
After clicking on the Save button you'll be redirected to the bot builder page where you can see the action you just created:
Test your bot
In order to test your bot you'll have to click on the Run Simulator button on the top right corner of the page. This will open a panel where you can test your new flow:
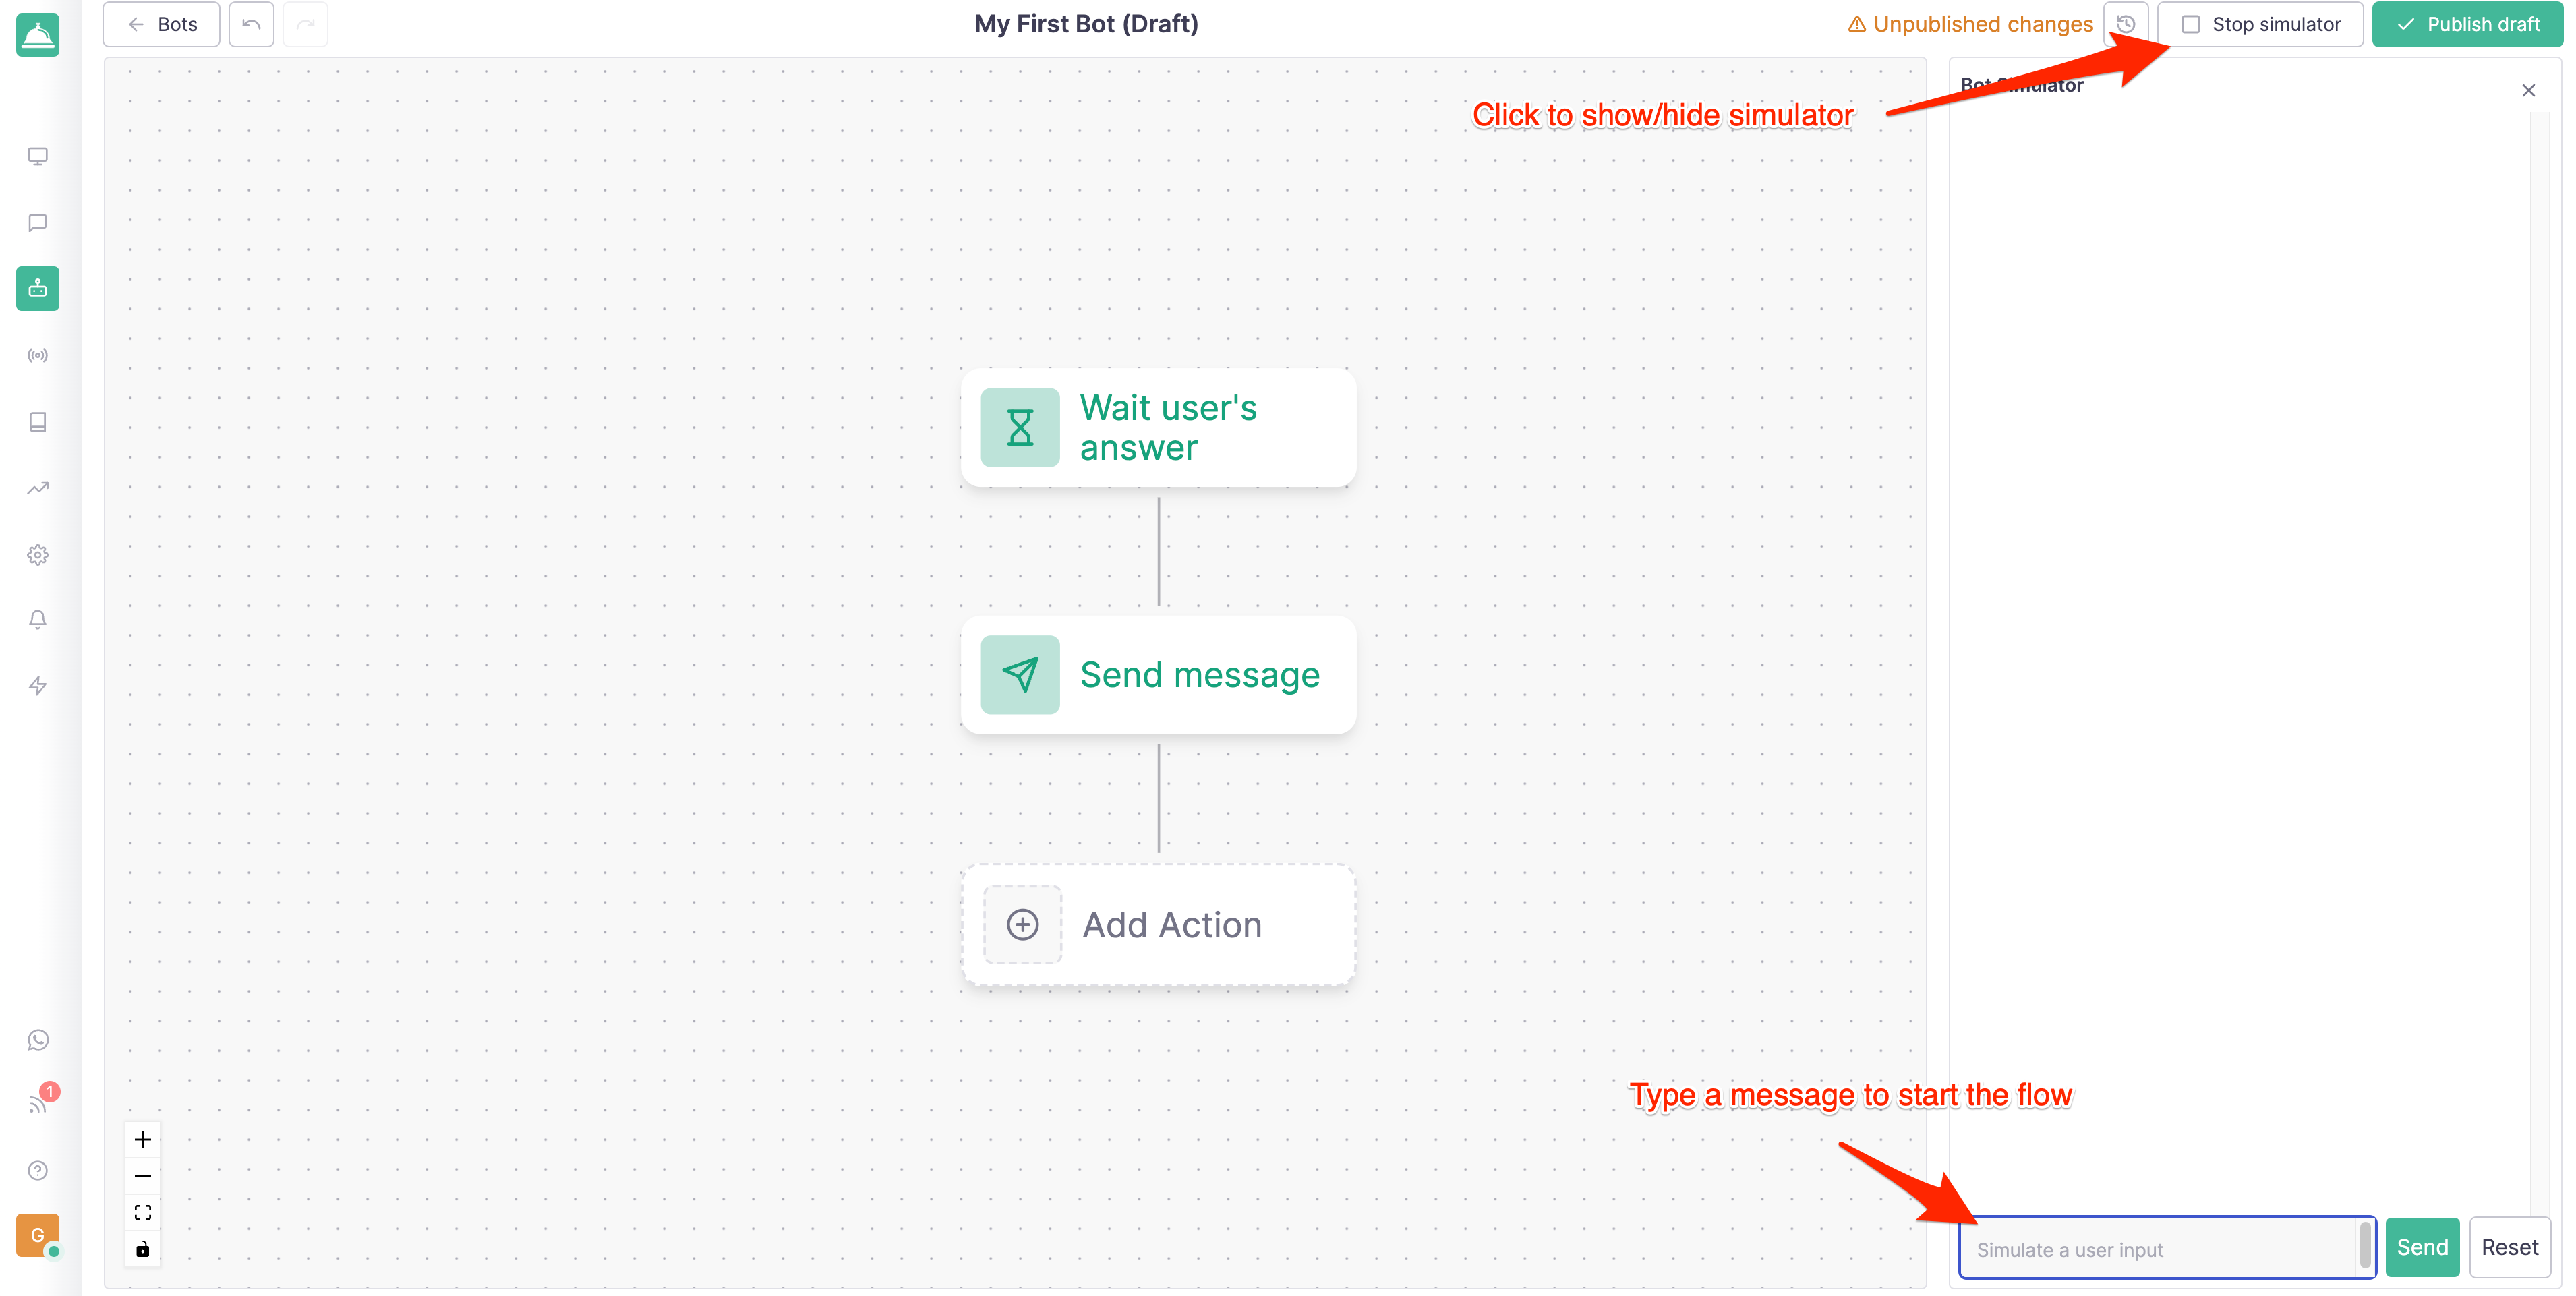
Just click on the Send button and you'll see the bot replying with the message you just configured:

Publish your bot
Once you're happy with your bot you can publish it by clicking on the Publish Draft button on the top right corner of the page:
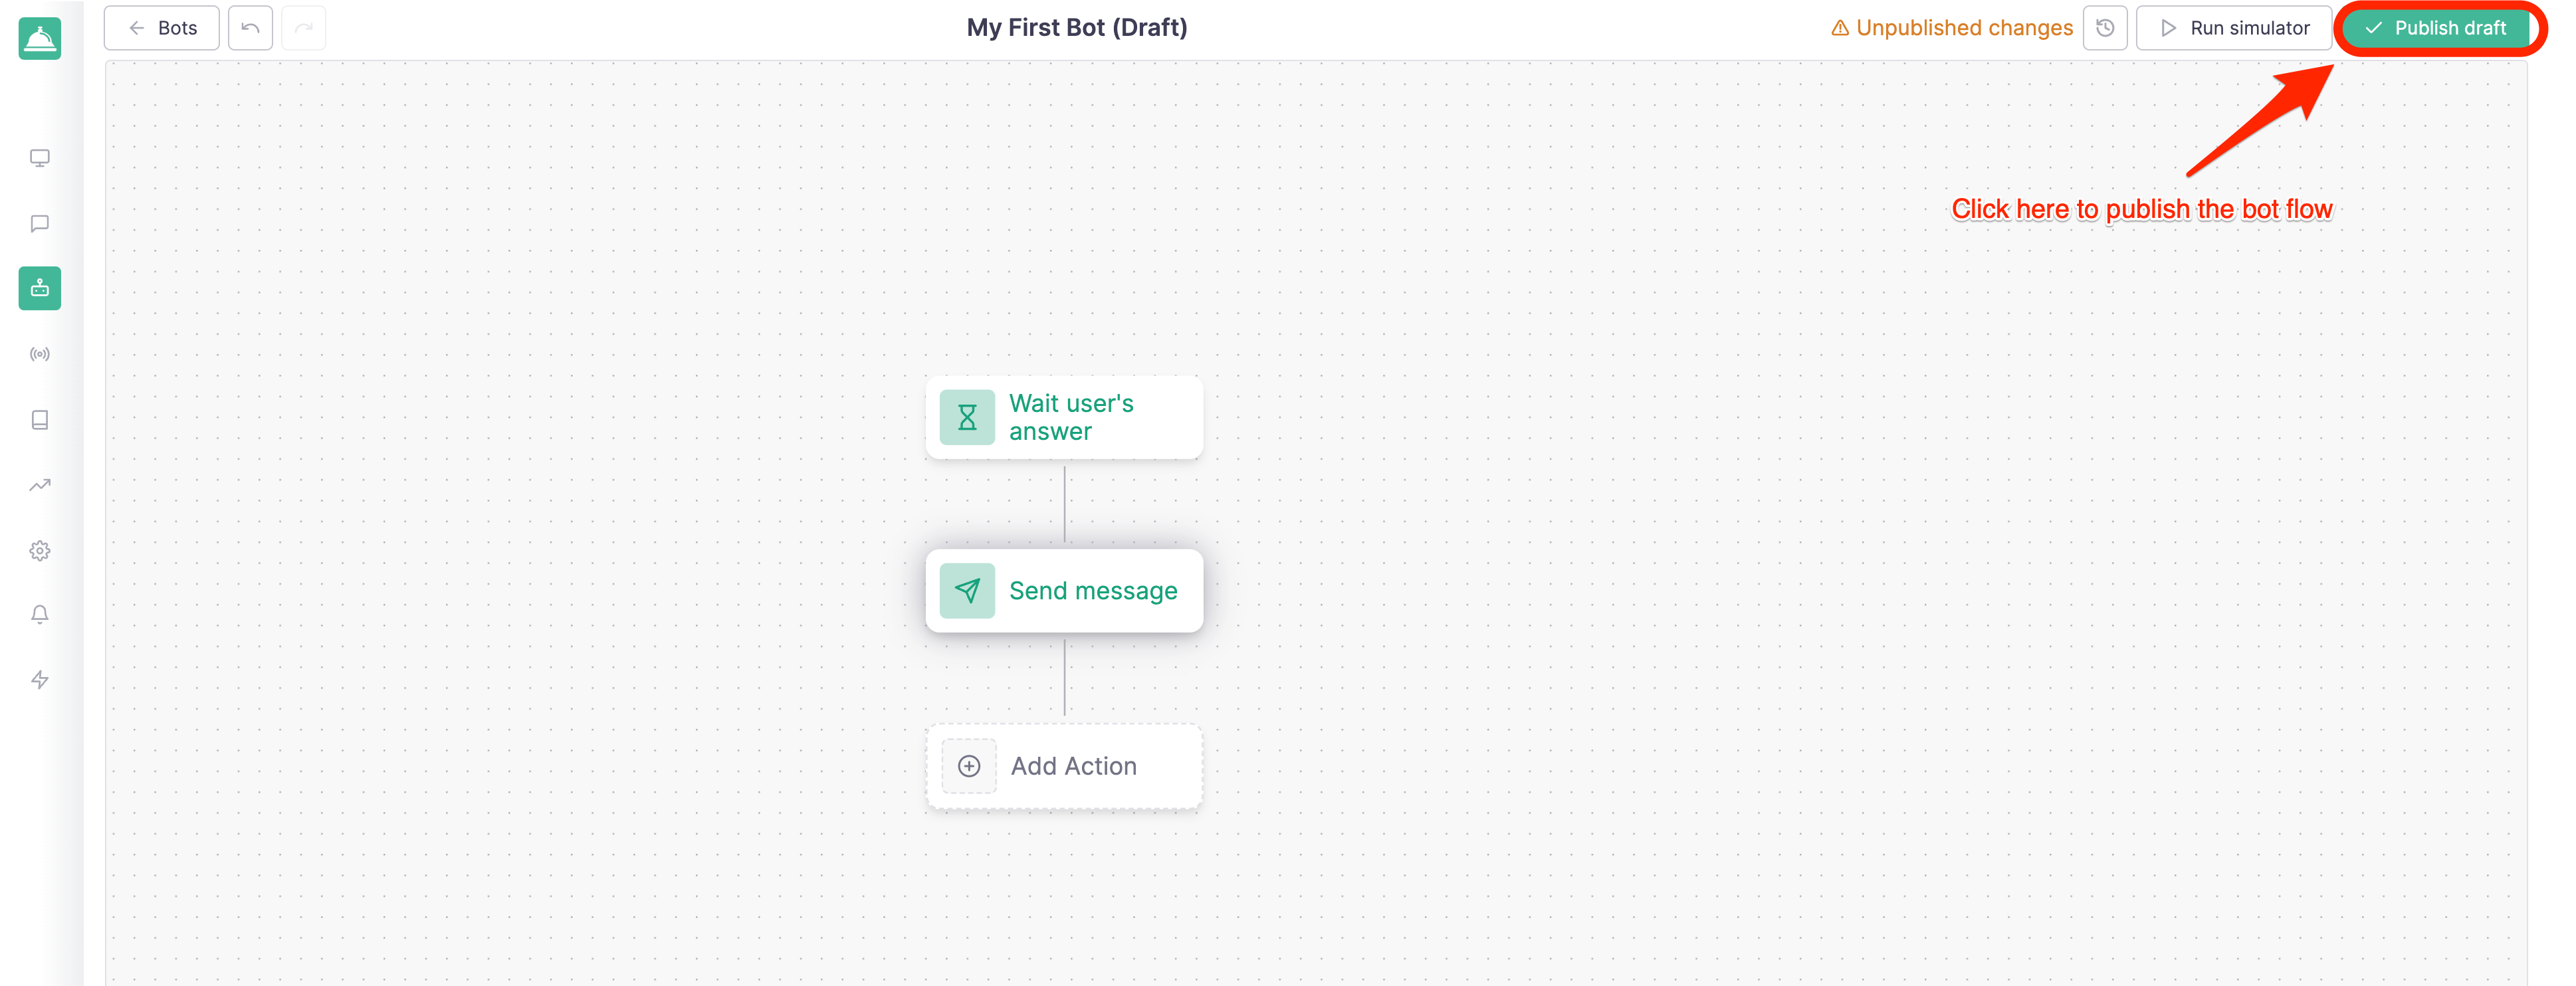
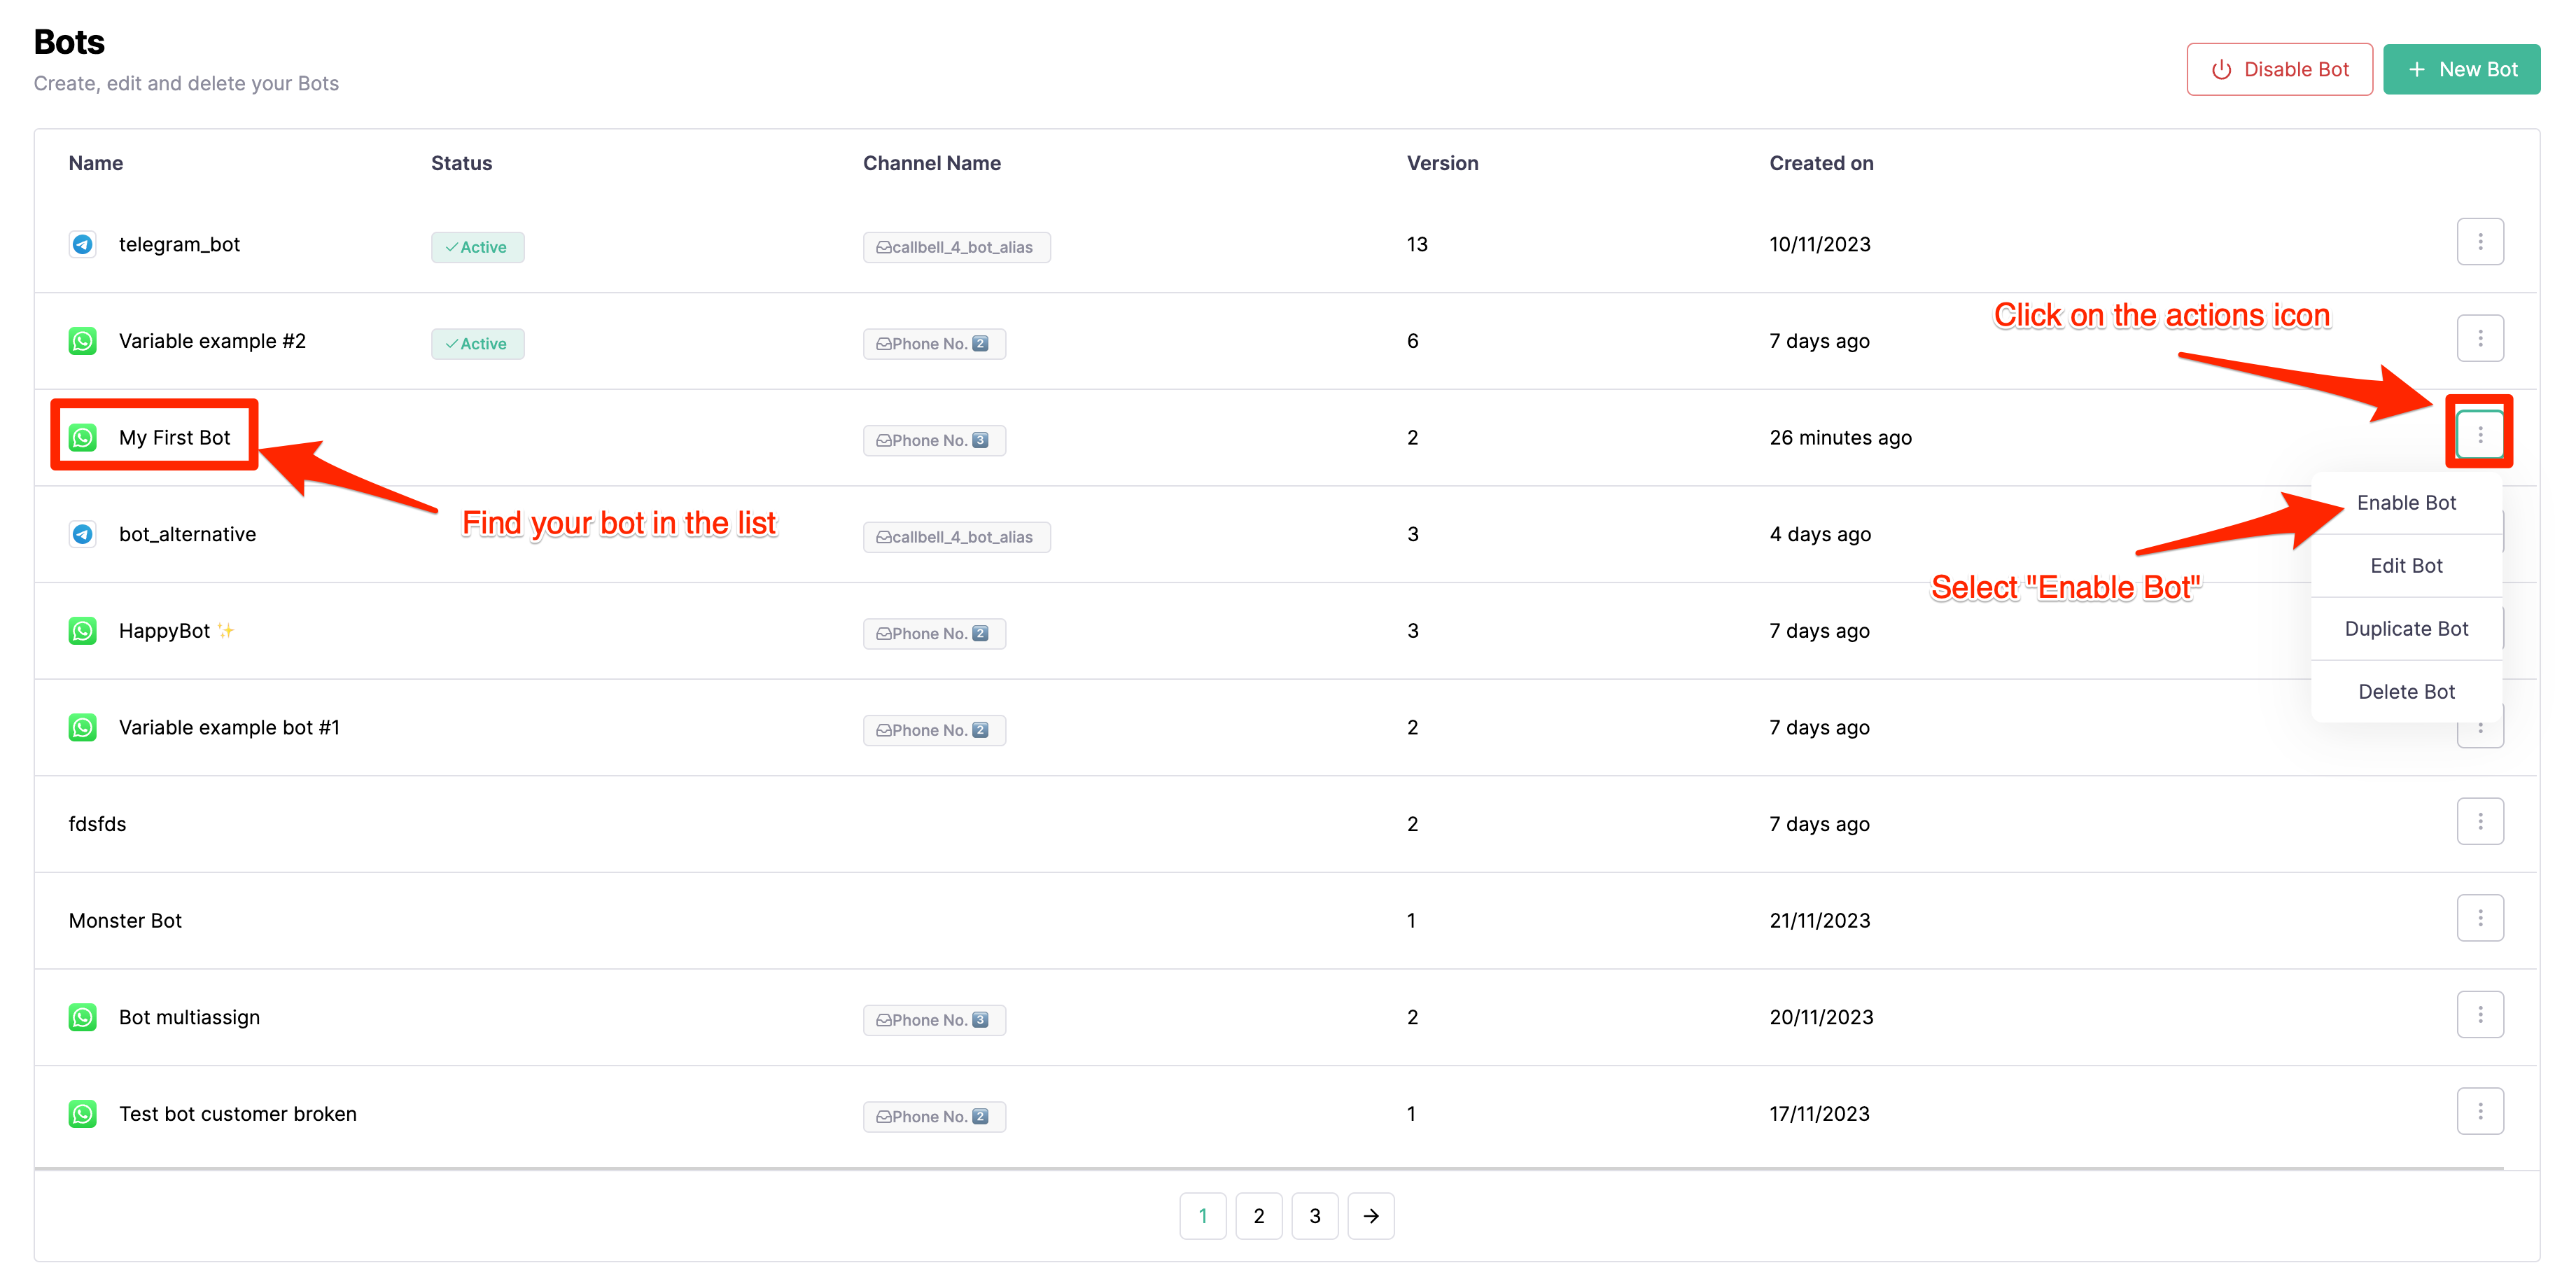
After clicking on the Publish draft button and confirming, your bot flow will be published; at the same time you'll need to enable your bot in order to make it available to your customers. You can do this by navigating back to the "Bots" section in the right sidebar and clicking on the Enable bot button:
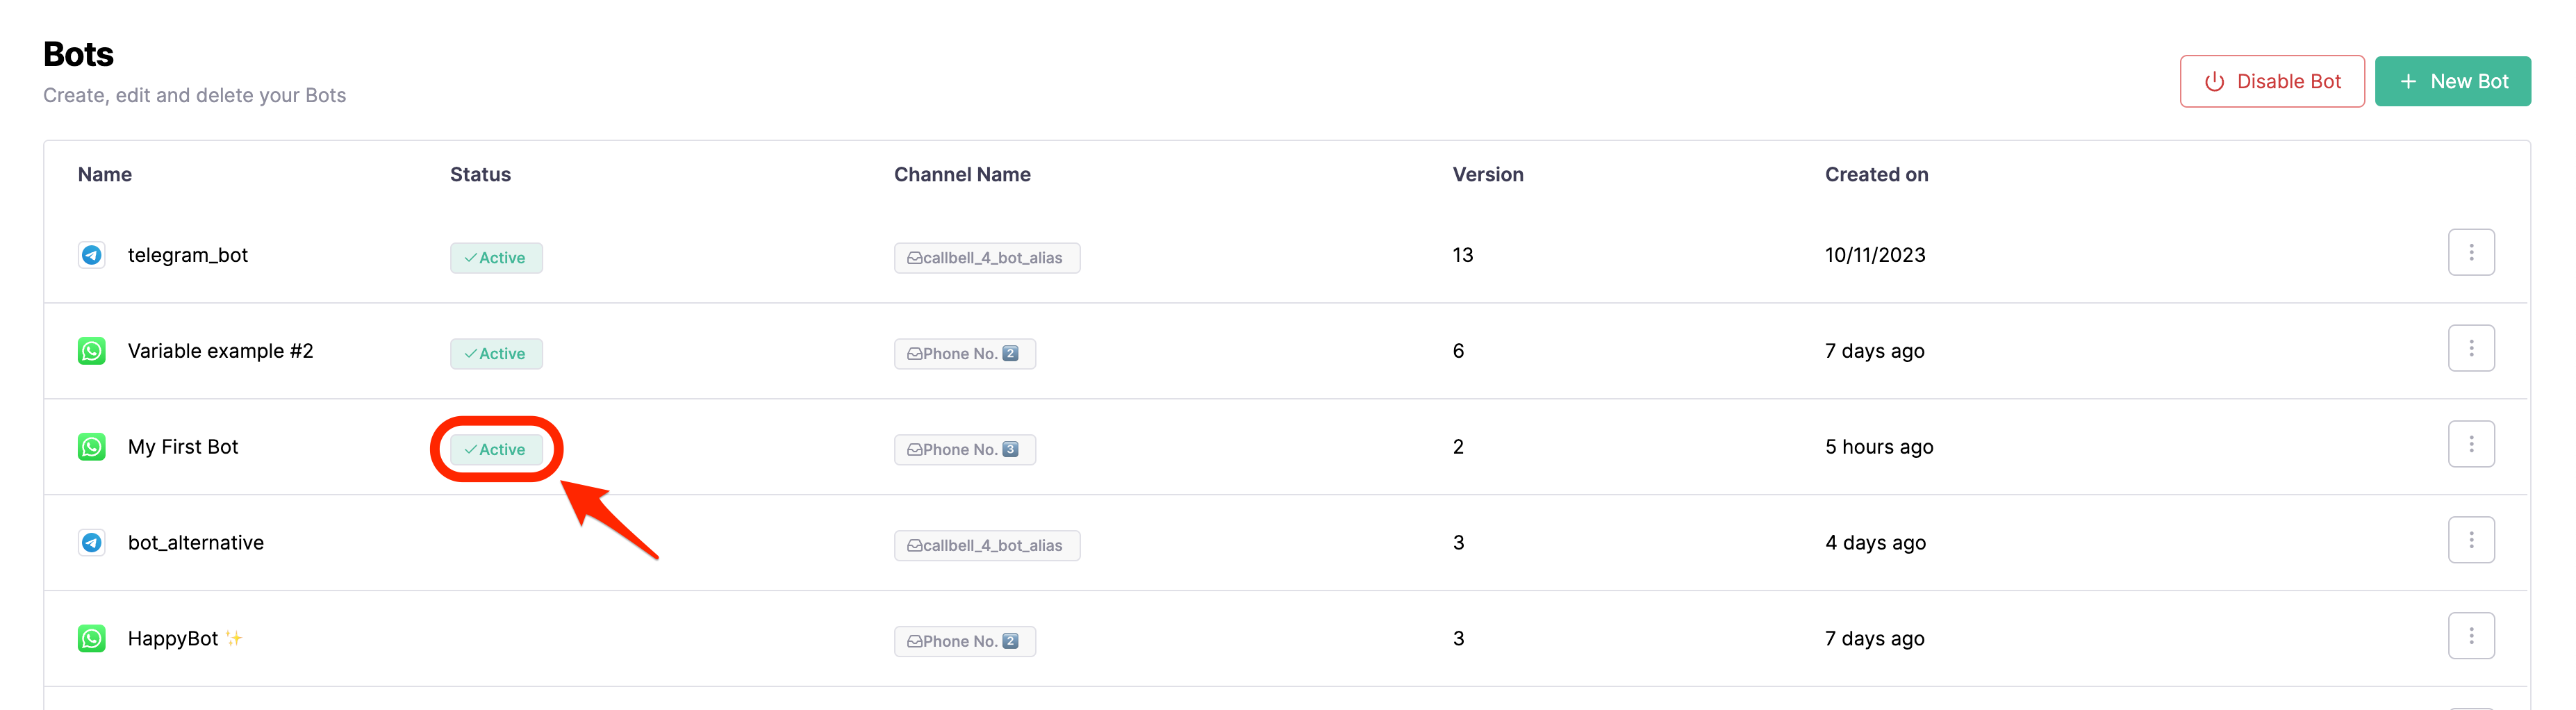
You can confirm that the bot is enabled by checking the status in the "Bots" section:
Test your bot in production
Now that your bot is enabled you can test it in production by sending a message to the channel you configured it with. In this case we'll send a message to the WhatsApp number we configured in the Prerequisites section:
What's next?
Now that you've created your first chatbot you can start exploring the other actions available in the bot builder.